
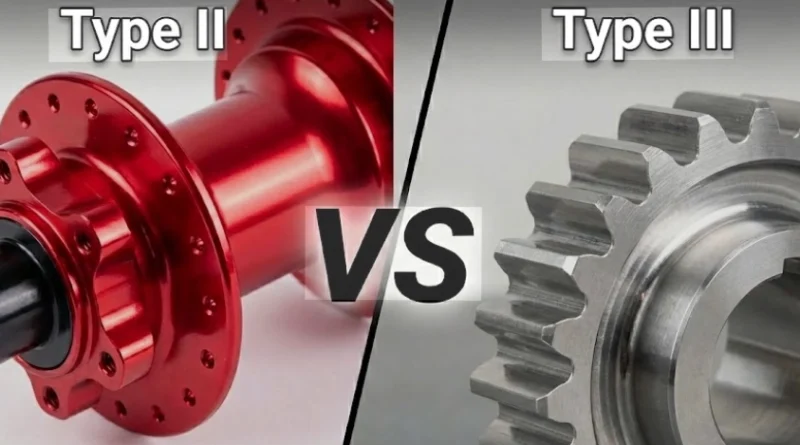
Type II vs Type III Anodizing Which Delivers Superior Hardness and Wear Resistance
Understanding the Fundamentals of Type II and Type III Anodizing
Aluminum anodizing plays a big role in everyday engineering. You see it on things like airplane parts or phone cases. The shiny or matte finish comes from a careful chemical process. When you look at type II vs type III anodizing, it’s important to know how each one changes the aluminum surface. This helps you pick the right one for your project.
Overview of the Anodizing Process
Anodizing is a way to use electricity and chemicals to oxidize aluminum. The metal becomes the positive part in a bath of liquid. This turns the surface into a tough aluminum oxide layer. The layer grows right from the metal, not like paint that sits on top. Things like the electric voltage, the mix in the bath, the water temperature, and how strong the current is all affect how the oxide builds up. For example, if you use more voltage and keep things cooler, you get a tighter, stronger layer.
This change makes the aluminum harder. It fights rust better. It also holds paints or sealers well. The oxide has tiny holes, so you can add colors and then seal them shut. In factories, workers tweak the current strength or stir the bath to get even coverage without slowing down production too much. I’ve heard from shop guys that getting the mix just right can save hours on big batches.
Defining Type II and Type III Anodizing
Type II anodizing means using sulfuric acid in a bath at about 20 °C. The oxide layer ends up 5 to 25 micrometers thick. People use it a lot for parts that need to look good. It gives even colors and good protection from wear.
Type III anodizing is what they call hardcoat. It runs in colder baths, from 0 to 5 °C. They push higher current to make layers 25 to 125 micrometers thick. These are great for tough machine parts that take a beating.
The thicker layer in type III makes a big difference. It boosts strength and lasts longer. But it can change sizes a bit, so you need precise cuts before starting. Type II works fine for everyday stuff. Type III shines in rough jobs, though it might need extra care in planning.
Comparative Analysis of Hardness in Type II vs Type III Anodizing
When you compare type II vs type III anodizing, hardness stands out. It shows how well a part handles rubbing or hits in real use.
Factors Influencing Hardness Development
The toughness of the oxide layer comes from its tiny structure. Think of density and how the crystals line up. In type III, the cold bath helps make a solid crystal setup with less empty space. That leads to better hardness.
The temperature during the process shapes how the alumina crystals form in the holes. A chilly bath stops the oxide from breaking down at the bottom of the pores. This builds a fuller layer. Sealing closes those holes with wet oxides. It helps against rust. But it might soften the top a tad as things settle. In one plant I know, they skip sealing on some tools to keep that edge sharp.
Measured Hardness Values and Performance Implications
For type II, hardness usually hits 200 to 400 HV on the Vickers scale. Type III can go up to 400 to 600 HV. It depends on the metal mix and how you run the bath. Plain aluminum scores under 100 HV. Some special alloys with hardcoat get as tough as treated steel on the surface.
The metal’s makeup matters a lot. Alloys with lots of copper or silicon might not get as hard. Other bits in the mix mess up the even growth. So, always pair the right metal with the anodize type. That way, you get steady results. For instance, in bike frames, picking the wrong combo led to quick scratches until they fixed the specs.
Evaluating Wear Resistance Between Type II and Type III Coatings
Wear is a key split between these two oxide layers. Tests in labs help, but real life with oil or rough partners changes everything.
Mechanisms of Wear Resistance in Anodized Layers
The oxide acts like a ceramic shield. It stops the metal from bending under slides. In type III, fewer holes mean less chance for cracks to start. This holds up against scrapes, even without grease.
Heavy pressure or back-and-forth motion wears type II quicker. The softer layer rubs off faster. Pick based on if your part gets light marks or constant grind. Like in gears, type II might do for show parts, but not for the working ones.
Laboratory Testing and Practical Observations
Tests use things like Taber wheels that scratch in a set way. Or disks that spin against a pin to check slip and wear. Data shows wear drops as layers get thicker, up to 75 micrometers. After that, built-up stress might hurt more than help.
Parts like pistons in machines or gun slides count on type III. They last longer when oil is spotty. One mechanic told me his shop switched to hardcoat on tools, and breakdowns dropped by half.
Thickness Considerations in Selecting Anodizing Types
Layer size affects more than strength. It changes how parts fit, their weight, electric blocking, and even the price tag.
Standard Thickness Ranges for Industrial Applications
For looks, type II stays 5 to 25 µm. It protects without messing up sizes much. Hardcoat type III goes 25 to 125 µm for heavy work. But thick layers can shift threads or tight fits in exact builds.
To fix that, cover spots with tape during the bath. Or grind key areas after. Like in engine bores, they hone to keep things snug. It’s a small step that avoids big headaches later.
Balancing Thickness with Performance Requirements
Thicker means better block for electricity. But too much can make it brittle. In parts that flex a lot, like plane wings, extra thickness might crack under repeats. Tune the current and cooling to match the job’s push or heat.
For heat jobs over 200 °C, thicker helps. But watch the load. A bad balance once cost a factory a whole run of faulty valves.
Cost Efficiency and Process Economics of Each Method
Money talks loud in picking type II or type III. It often decides before you think about strength.
Production Costs Associated with Each Anodizing Type
Type III needs more power. Cooling the bath takes chillers, and high current eats electricity. Machines cost more too, with strong supplies for long runs.
Keeping the acid level steady is trickier in hardcoat setups. A little off, and the layer looks wrong. So, runs go slower than warm type II lines. But in high-volume spots, they plan shifts around it.
Evaluating Cost-to-Benefit Ratios for Industrial Applications
Type III can cost twice as much per piece. Yet, it lasts way longer with less wear. That saves on swaps in planes, army gear, or car motors. For pretty items like gadgets, type II wins on price since looks matter more than toughness.
Think long-term. A client I recall saved thousands by going hardcoat on warehouse carts—they barely needed fixes after a year.
Surface Appearance, Coloration, and Finishing Options
How the surface looks after anodizing changes with layer size and hole control.
Visual Characteristics After Anodizing
Type II gives a shiny base for bright dyes. You get golds or blacks easily as holes soak up color before seal. Type III turns dull gray from thick scatter. For lively shades, extra steps might dull the toughness a bit.
Texture shifts too. Hardcoats feel matte, good for grip. Thinner ones shine for tech shells. In one design, they mixed finishes for a phone case—shiny sides, tough edges.
Compatibility with Secondary Finishing Processes
Both hold paints or oils well after seal. Laser etch shows clear on hardcoat’s dark base. No need for extra color. It’s big for plane parts that need ID numbers.
Sealing sets it up right. Skip it, and things peel fast in wet spots.
Environmental and Operational Durability Aspects
Strength goes past scrapes. How it handles weather or chemicals sets the real lifespan.
Corrosion Resistance Under Various Conditions
Sealing turns open holes into wet barriers against water. Salt tests show sealed type II holding 500 hours no pits. Without, they rust quick. Type III fights better from thickness alone. But seal helps in salt air or plane fluids.
In coastal shops, unsealed parts failed in months. Sealed ones? Years of service.
Thermal Stability and Chemical Resistance Differences
Type III stands hotter before give. Good for motor covers or brakes over 200 °C. Dense setup blocks solvents better than holey type II on building panels.
Chemicals eat thin layers faster. One case saw frames warp from cleaners until they switched.
Strategic Selection Guidelines for Engineers and Manufacturers
Picking type II vs type III anodizing comes down to the job, not old ways.
Matching Coating Properties to Functional Requirements
Start with needs: looks or lasting? For camera bits or trim, type II saves cash with color choice. For valves or gears under rub, type III cuts repair time.
Match budget to the spot. Mix layers sometimes—pretty over tough—for best of both. It’s not always black and white; real projects mix it up.
Long-Term Maintenance and Lifecycle Considerations
Type II shines indoors for years. Outdoors, it fades without seal. Hardcoat takes decades in tough factories with mild soap cleans. Acids reopen holes, so stick to basics.
Plan early. Field woes like color fade or stuck parts hit hard if you skip checks. Many teams learn that after one bad batch.
FAQ
Q1: What distinguishes type II from type III anodizing?
A: Type II uses moderate-temperature sulfuric acid baths producing thin decorative coatings (5–25 µm), while type III operates colder at higher current densities yielding thick hardcoats (25–125 µm) designed for wear resistance.
Q2: Which has greater surface hardness?
A: Type III typically reaches 400–600 HV compared with about 200–400 HV for type II due to its denser crystalline structure formed at low temperature conditions.
Q3: Can both types be dyed?
A: Yes—but dye uptake differs; porous type II layers accept bright colors easily whereas dense grayish hardcoats limit vivid coloration unless modified post-process.
Q4: How does cost compare between them?
A: Hardcoat (type III) costs more because it requires chilled baths and higher power input yet offers longer lifespan under abrasive conditions making it economical long term in heavy-duty uses.
Q5: What factors guide selection?
A: Base alloy composition, required wear life, desired appearance, operating environment temperature range, dimensional tolerance limits—all determine whether you should specify a standard sulfuric finish (type II) or full hardcoat (type III).