
Is Drill Reaming the Absolute Solution to Inaccurate Drilled Holes
Understanding the Fundamentals of Hole-Making Processes
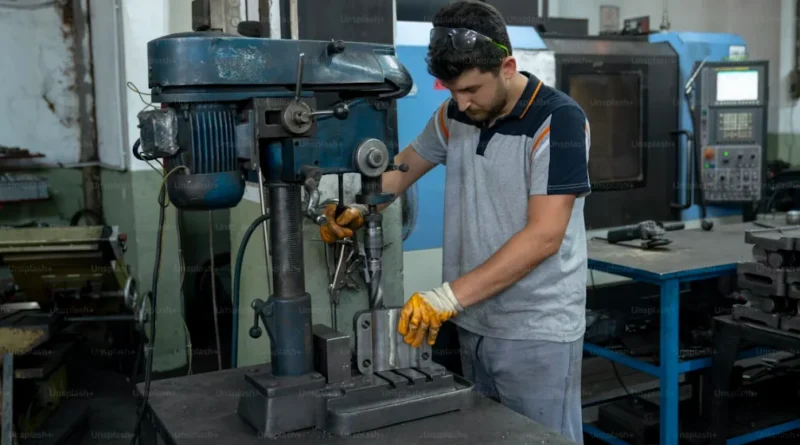
Drill reaming stands as a basic yet often confusing task in careful machining work. Folks sometimes think that just drilling will give a spot-on hole. But things are trickier than that. Drilling makes the basic path. Reaming then cleans it up nicely. Picture drilling like rough building work. Reaming is more like careful wood shaping. Both matter a lot. They just aim for different results.
The Role of Drilling in Material Removal
Drilling sets up the first hole shape by pushing material aside. It mainly aims for speed, not exactness. The main point is to make a hole fast and without waste. This gives a base for later steps, like reaming or boring, to improve it. Things like tool shape, feed speed, and cutting pace matter a great deal. They decide how neat the hole turns out. They also show how much fixing it needs after. Take an example: a fast feed might boost output. But it can also lead to rough edges or bumpy spots. These issues later mess with reaming evenness. In one shop I recall, they pushed the feed too hard on steel parts. It sped things up, sure. Yet, the burrs caused headaches in the next stage. Workers had to clean extra, which slowed the whole line.
The Purpose of Reaming in Precision Machining
Reaming fixes up holes drilled before to hit close size limits and smooth surfaces. It takes away very little material. Often, it’s just a tiny bit, like a few hundredths of a millimeter. But it straightens out flaws from drilling. When done right, a reamed hole gets better round shape, center match, and size hold. This goes way past what drilling does by itself. Main factors include tool build, lubricant quality, and straight-line setup. They decide if your holes fit tough rules, like those for plane parts or health tools. Even a small off-line match between drill and reamer can ruin the size ranges. Think about a medical device maker. They once skipped perfect alignment. The result? Holes that didn’t seal right, leading to rework and delays.
Comparing Drilling and Reaming in Dimensional Accuracy
Looking at drilling and reaming for exact results means checking how each deals with size changes and surface quality. Drilling lays the groundwork. Reaming brings the final quality.
Tolerance Capabilities of Drilled vs. Reamed Holes
Holes from drilling often have bigger size differences. This comes from tool bending, shakes, or rubbing during the job. Such changes can make fits too snug or too slack for putting parts together. Reaming fixes this by cutting a small even layer from the hole’s inside wall. It straightens those errors. Your choice matters: a solid carbide reamer gives strength. An adjustable one works for different sizes. In good setups, you can hit tolerances from IT8 to IT6 or finer. For instance, in auto parts, drilled holes might vary by 0.05 mm. After reaming, that drops to 0.01 mm. It’s a game-changer for tight assemblies.
Surface Finish Considerations in Both Processes
Drilling leaves behind twist marks from the tool and tiny rough bits. These can block smooth fits or leak-proof spots. Reaming evens them out. It cuts instead of ripping material threads. This leads to smoother Ra numbers, often under 1 µm for top work. Good coolant flow cuts down on rub heat. It also stops shaky marks that mess up evenness in long jobs. I’ve seen cases where poor coolant caused heat spots on aluminum. The finish got wavy, and parts failed tests. Simple fix: better hoses and steady flow.
The Mechanics Behind Drill Reaming Precision
Getting exactness in drill reaming relies on how stuff acts under pressure. It also depends on tool and material talks during cuts. Metals like titanium need slow paces because they don’t shed heat well. Aluminum lets you go faster without hurting the smooth look.
Material Behavior During Drill Reaming Operations
The hardness of the piece affects how chips form and stay steady when the reamer bites in. Tough blends make broken chips. These can clog the grooves if you don’t clear them right. Keeping removal steady stops heat twists that might widen holes for a bit. Then they shrink back as it cools. Sizing before drilling counts too. Leave about 0.2–0.4 mm extra. This spreads the cut load evenly on reamer sides. In practice, for stainless steel, we always left 0.3 mm. It kept things stable, no jams or warps.
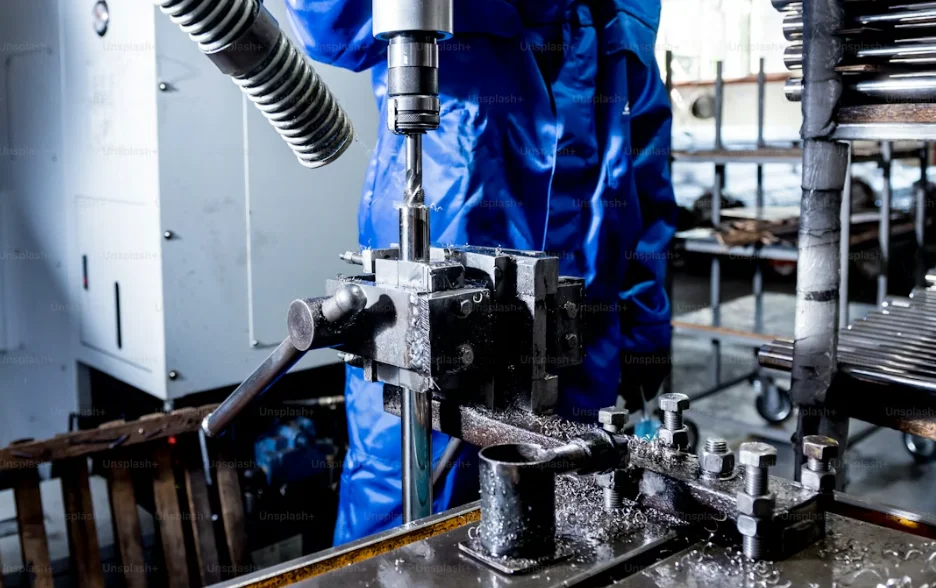
Tool Geometry and Alignment Factors Affecting Precision
Tool shape sets how easy chips leave the cut area. It also keeps cut pushes even around the hole’s edge. Changing the helix angle helps chip move in bendy stuff. But it might shake more in breakable ones like cast iron. Off-line setup between drill and ream paths causes egg shapes or flared ends. These fail checks on measuring gear later. Piloted reamers with guides keep lines matching through the full depth. One tip from old-timers: always check alignment with a test hole first. Saves headaches down the line.
Process Optimization for Superior Hole Quality
Improving drill-ream steps means mixing pace with steadiness. You also watch wear over batches.
Selecting the Right Drill-Ream Sequence Parameters
Feed rate needs to be quick for good chip breaks. But not so fast it smears at the start. Pace choice ties to piece toughness and cover type. TiN-coated tools handle more turns per minute than plain high-speed steel ones. That’s because of less rub. Coolant must hit the grooves steady. Weak lube builds heat differences. This dulls edges too soon. In a real run, say for 500 parts, we tweaked speeds from 2000 to 1500 rpm on harder stock. Output stayed high, quality too.
Monitoring Tool Wear for Consistent Performance
Wear builds slow. But it adds up over lots of pieces, like thousands a day. As tips blunt, rub grows. This shifts sizes past okay limits. Check often with eye tools or touch sensors. This tracks dulling before sizes go bad in the middle of a batch. Smart systems use shake checks to guess when a reamer’s done. They spot changes in machine pull. Funny thing: once we ignored a vibration alert. Lost a whole shift’s work. Lesson learned—listen to the data.
Integrating Drill Reaming into Advanced Manufacturing Systems
Today’s making folds drill reaming into auto CNC flows. Here, steady work beats hand skill changes.
Automation and CNC Control Enhancements in Hole-Making Accuracy
CNC brains line up feed shifts between drill and ream passes on their own. This cuts wait at hole starts. Waits can ridge the inside walls. Smart rules tweak feed push as sensors catch bend jumps from tough bits in the stuff. They hold size goals without people stepping in. Twin models on computers let planners test tool paths in fake runs first. This saves time and stuff costs before real machines. In big plants, this setup cut errors by 30%. Pretty neat for keeping things humming.
Quality Assurance Through Metrology Integration
Size checks don’t wait till the end anymore. Live sensors gauge hole sizes non-stop in runs. They fix drifts right away if patterns show early. CMM tools check final fits against drawing sizes. Stats boards show steady trends over days or twin machines on lines. One factory used this to spot a machine drift at shift three. Fixed it fast, no scrap pile-up.
FAQ
Q1: Why isn’t drilling alone sufficient for precision holes?
A: Drilling mainly works to make an early path fast. Yet, it can’t hit close sizes. Tool bends bring size shifts that only later fixes like reaming can mend.
Q2: How much material should remain before reaming?
A: Usually leave 0.2–0.4 mm extra based on piece toughness. This lets even cuts without pushing edges too hard or starting shakes.
Q3: What surface roughness values are typical after drill reaming?
A: Well-done drill-ream jobs give inside smooths under 1 µm Ra. That’s good for fluid setups needing low leaks.
Q4: Can CNC automation improve drill-ream accuracy?
A: Yes, CNC gear lines up feeds exact between steps. Smart tweaks handle changes auto when loads shift from stuff differences.
Q5: How do you detect early signs of tool wear during production?
A: Check with eye tools after set times or watch machine power signs. Rising power use often flags tip wear before you see it.